Multi-Location Configuration for a Single MikroTik NAS with Powerlynx
This technical guide explains how to configure a single MikroTik NAS to serve multiple Powerlynx locations simultaneously. This allows you to provide different Splash Pages and data plans (e.g., Hotel, Cafe, and Office) from one hardware unit.
Architecture Overview
Currently, a single MikroTik device can be connected to up to three Powerlynx locations simultaneously by utilizing three distinct connection methods:
-
WireGuard Tunnel
-
OpenVPN Tunnel
-
Public IP (Direct)
The RADIUS Challenge
By default, if multiple RADIUS clients are configured for the same service (e.g., hotspot), RouterOS uses the entry with the lowest ID and treats others as failovers. To bypass this, we use Domain Matching to map specific Hotspot profiles to specific RADIUS server profiles.
Resource Management: Ensure your MikroTik hardware (CPU/RAM) is capable of handling multiple VPN tunnels and concurrent Hotspot users before deployment.
1. WireGuard Connection (Location A)
For the first location, use the Simple Setup → Full Setup WireGuard script. In my example location is “Test Environment”.
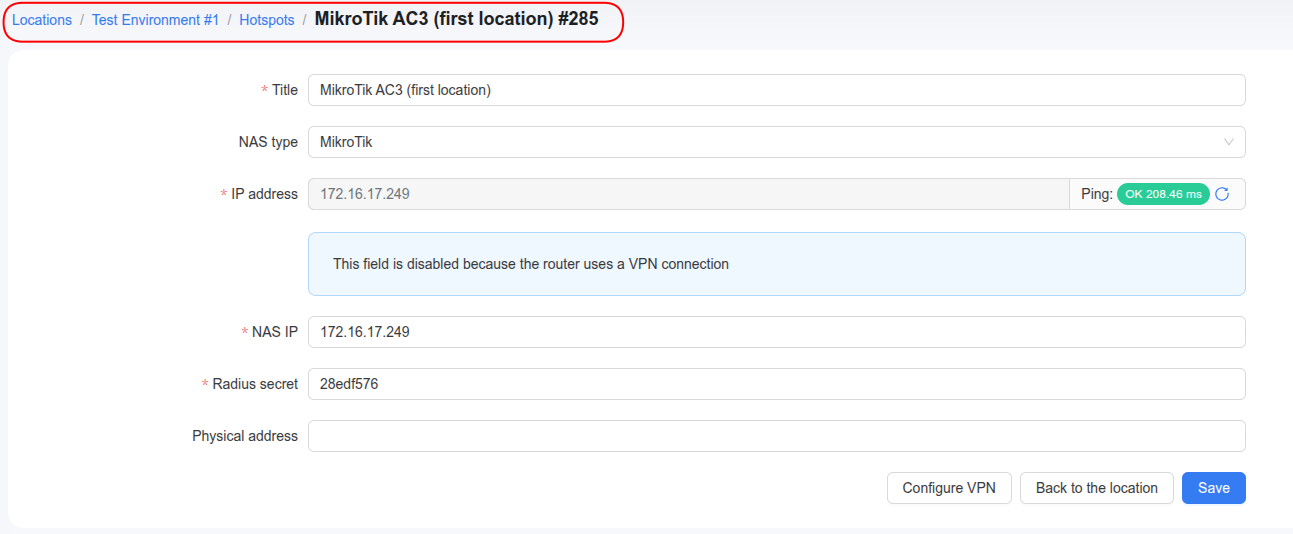
Resulting Configuration:
-
Interface:
powerlynx-bridge -
Hotspot Server: e.g.,
test_environment -
RADIUS Client: Configured for WireGuard.

Adjustments
To ensure the correct RADIUS profile is triggered:
- RADIUS Profile: Navigate to
/radius. Edit the profile created for WireGuard and set the Domain field tovpn.powerlynx.app.
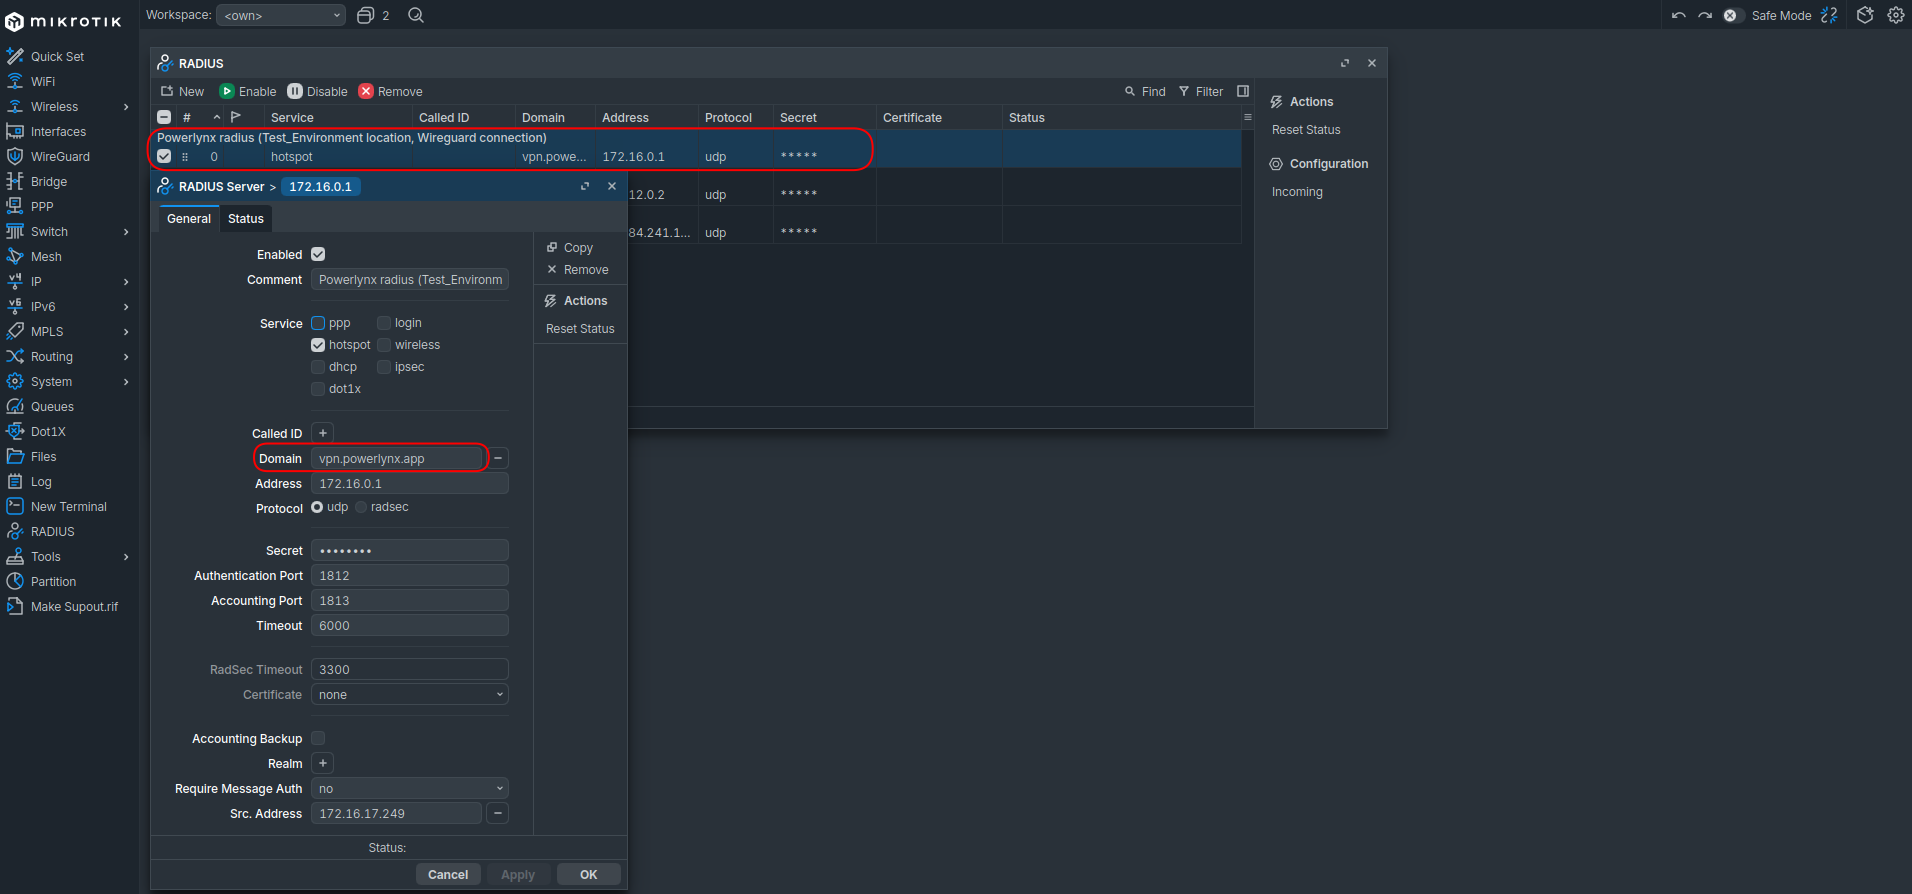
- Hotspot Profile: Navigate to
/ip hotspot profile. Select the profile used by your WireGuard hotspot. Under the RADIUS tab, set Default Domain tovpn.powerlynx.app.

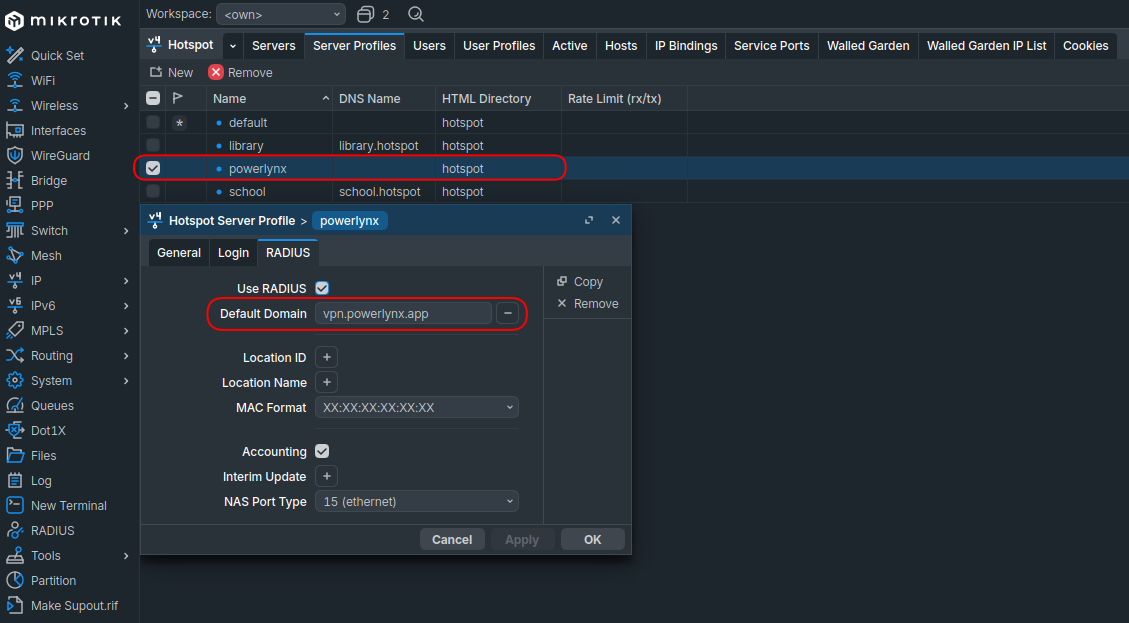
2. OpenVPN Connection (Location B)
In my case I used location “School”.
For the second location, you must use a manual approach to avoid overwriting existing WireGuard settings.
IMPORTANT: Use
Simple Setup -> Setup VPN (OpenVPN)only. Do not use “Full Setup,” as it may conflict with your existing configuration.
Steps:
-
Establish the OpenVPN tunnel.
-
Follow the MikroTik Advanced Setup starting from Step 3. Step 4 can be skipped.
-
Resulting Configuration: A unique interface (e.g.,
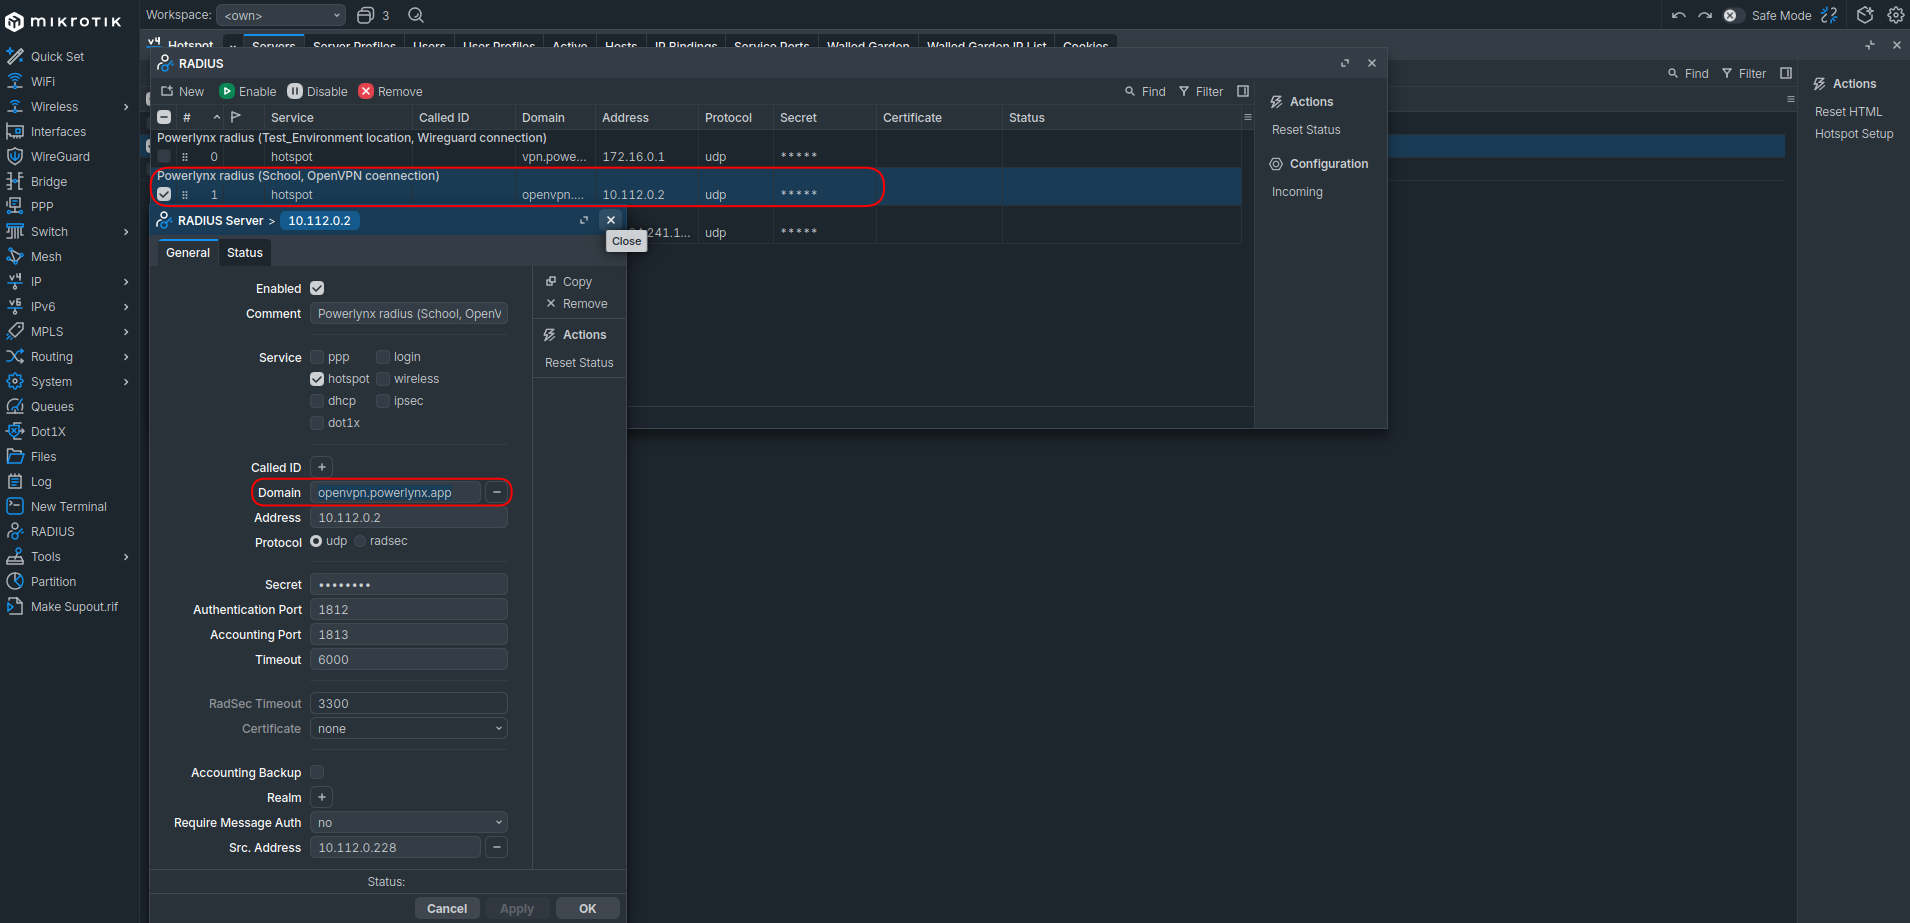
powerlynx-school) and a second RADIUS client.
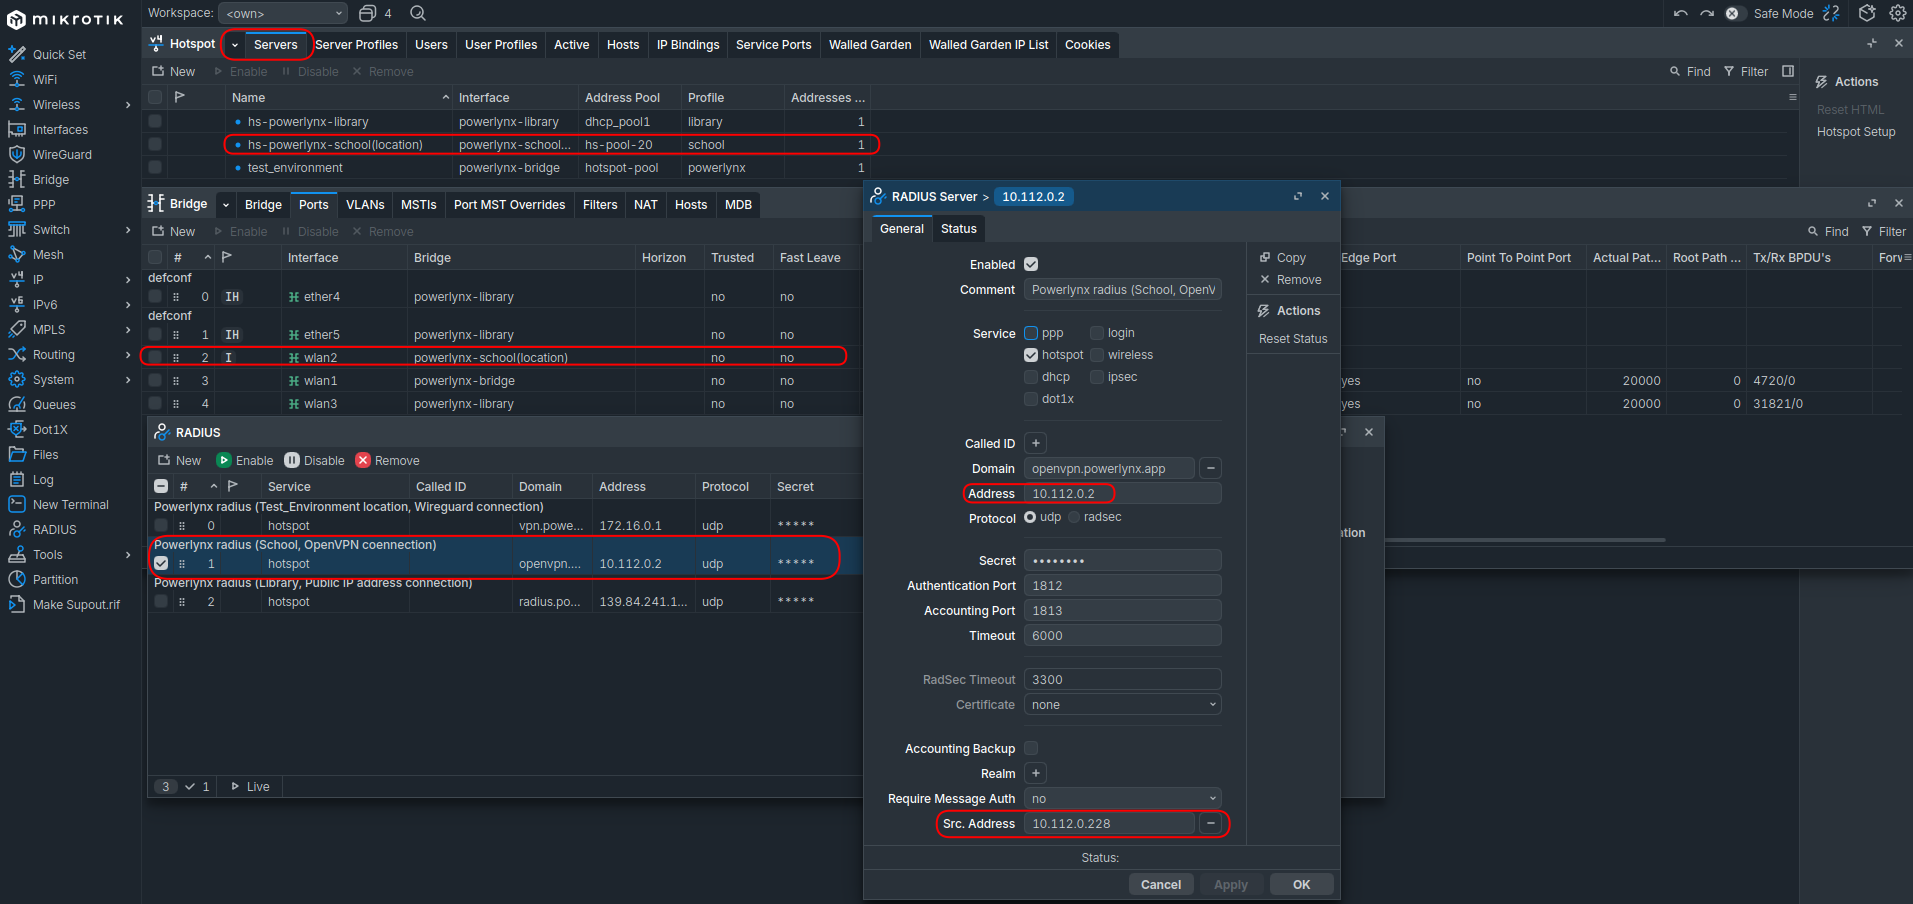
Adjustments
- RADIUS Profile: In
/radius, set the Domain for this profile toopenvpn.powerlynx.app.
- Hotspot Profile: In
/ip hotspot profile, select the profile for this location. Under the RADIUS tab, set Default Domain toopenvpn.powerlynx.app.
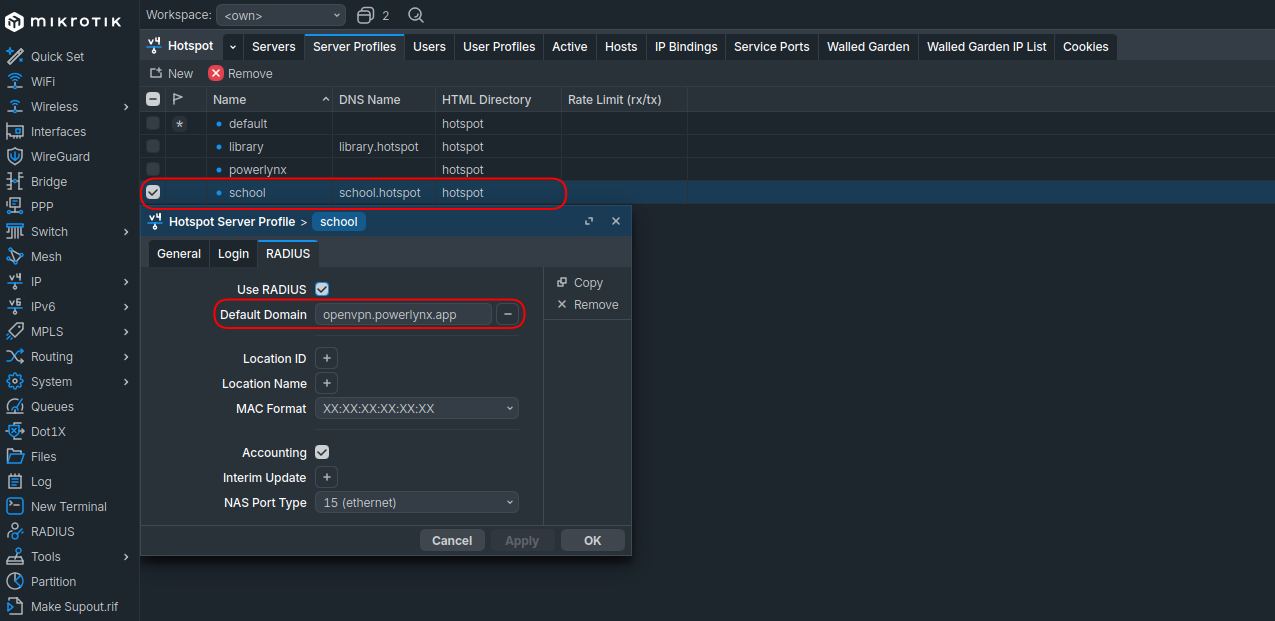
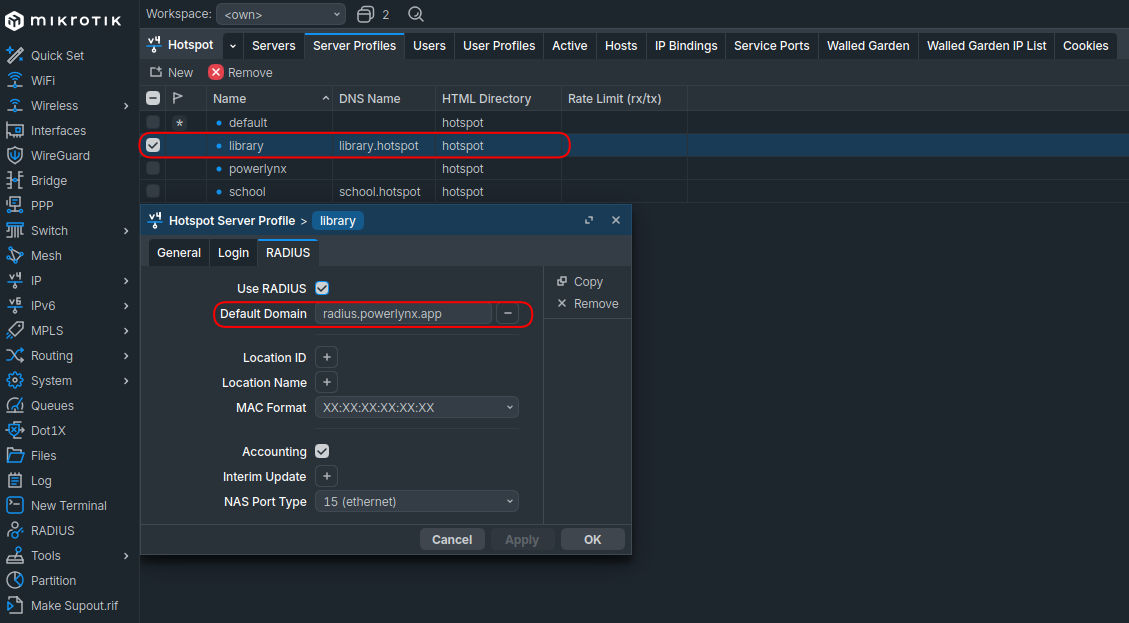
3. Public IP Connection (Location C)
In my case I used location “Library”.
This method is used if your MikroTik has a static Public IP reachable by the Powerlynx RADIUS server.
Steps:
-
Follow the MikroTik Advanced Setup starting from Step 3. Step 4 can be skipped.
-
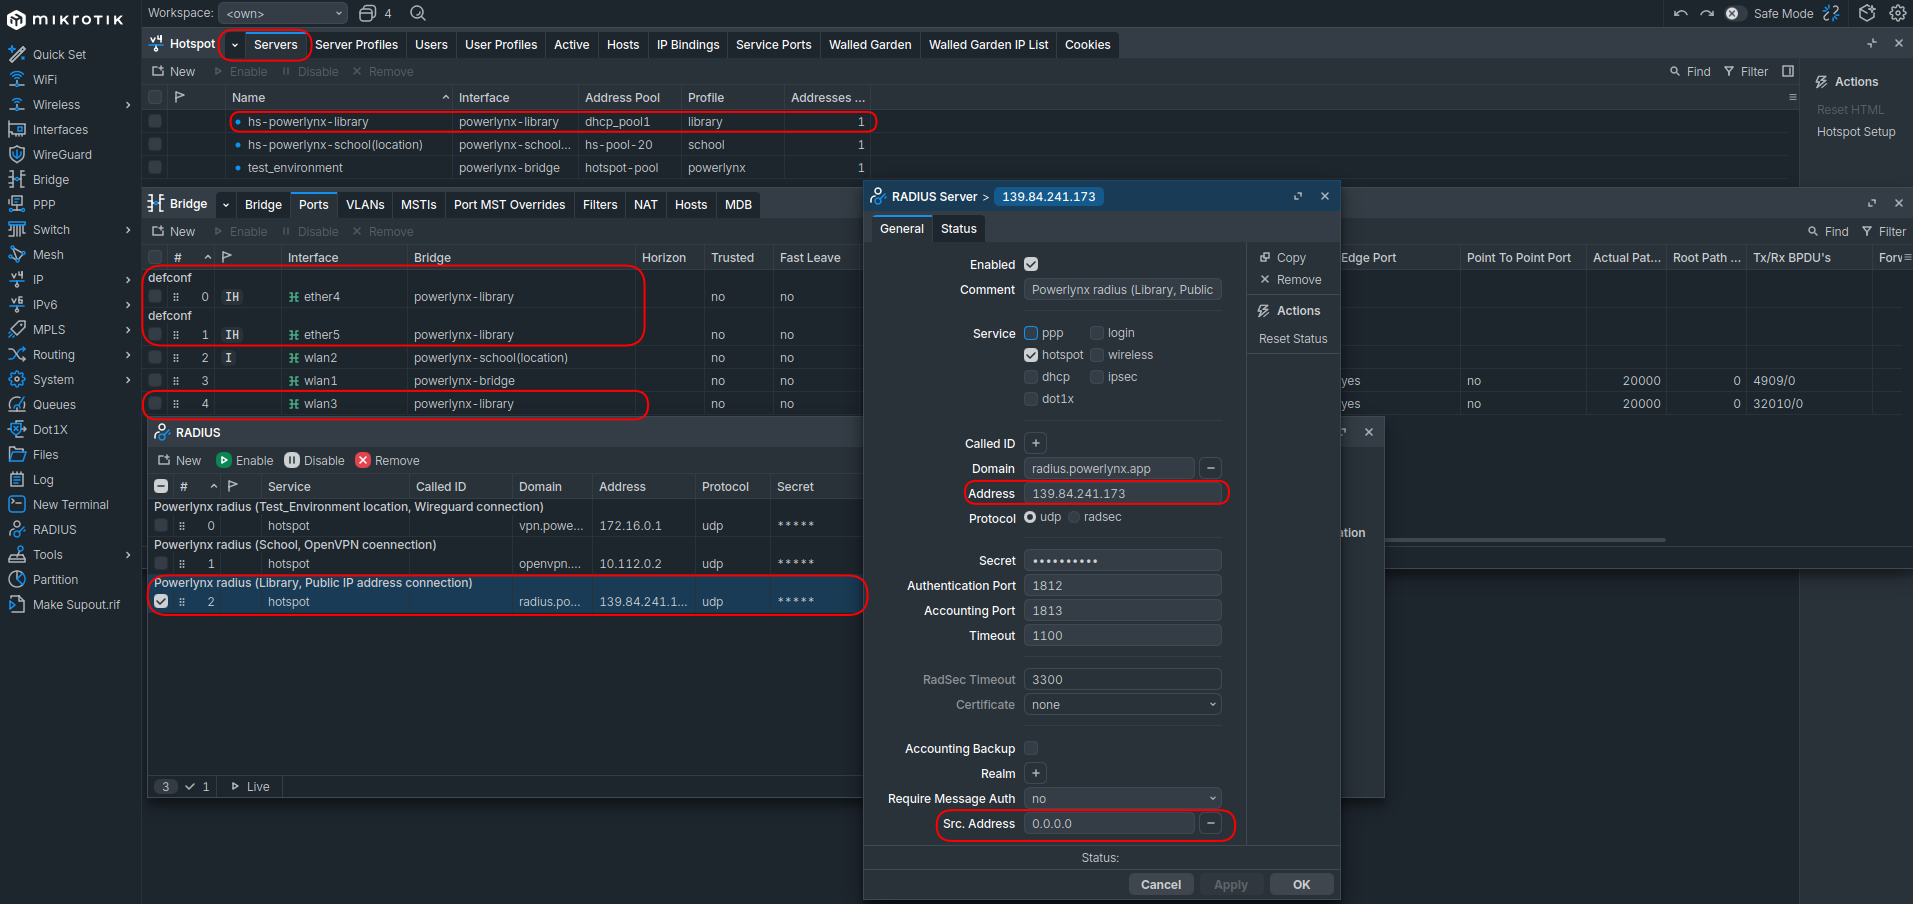
Resulting Configuration: A unique interface (e.g.,
powerlynx-library) and a third RADIUS client.
Adjustments
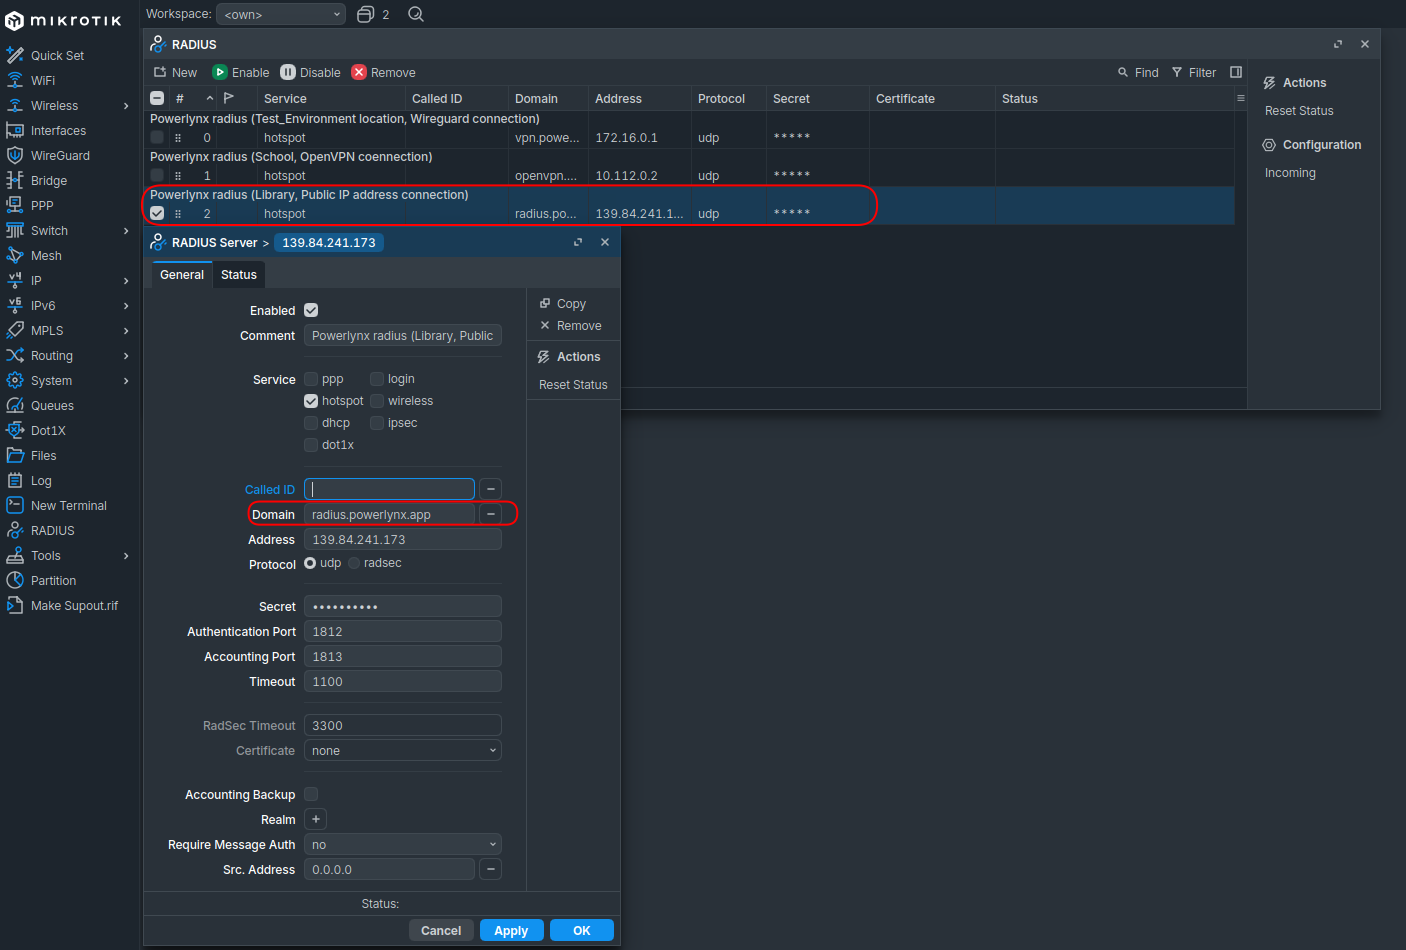
- RADIUS Profile: In
/radius, set the Domain for this profile toradius.powerlynx.app.
- Hotspot Profile: In
/ip hotspot profile, select the profile for this location. Under the RADIUS tab, set Default Domain toradius.powerlynx.app.
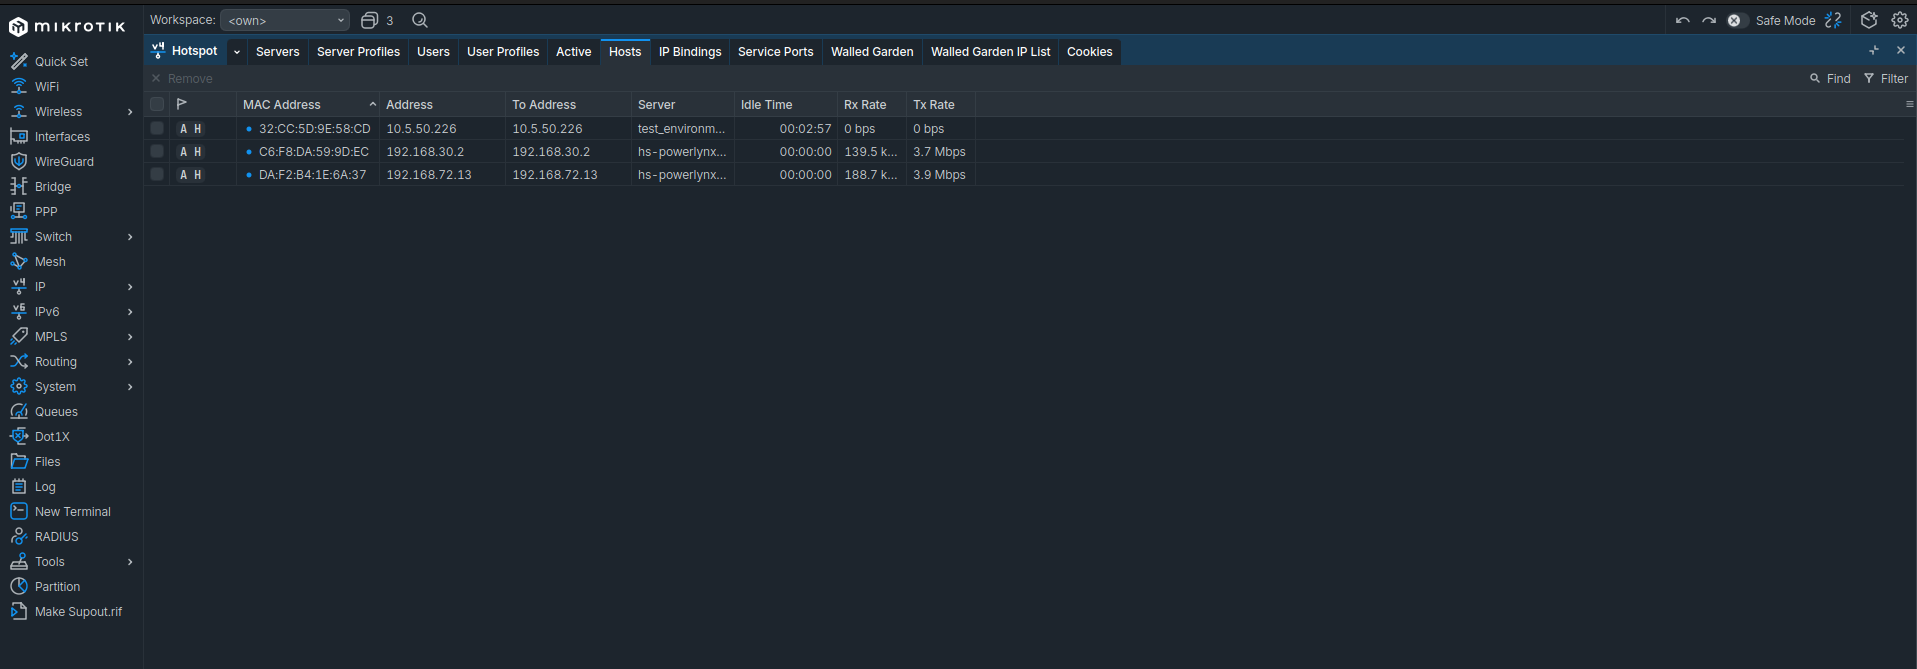
Verification & Troubleshooting
Walled Garden Check
Ensure the Powerlynx domains are accessible across all hotspot instances.
Importnant note: If a specific Hotspot Server is explicitly defined in a Walled Garden entry, it may block traffic for the other locations. Set the
Serverfield toallor leave it blank in/ip hotspot walled-garden.
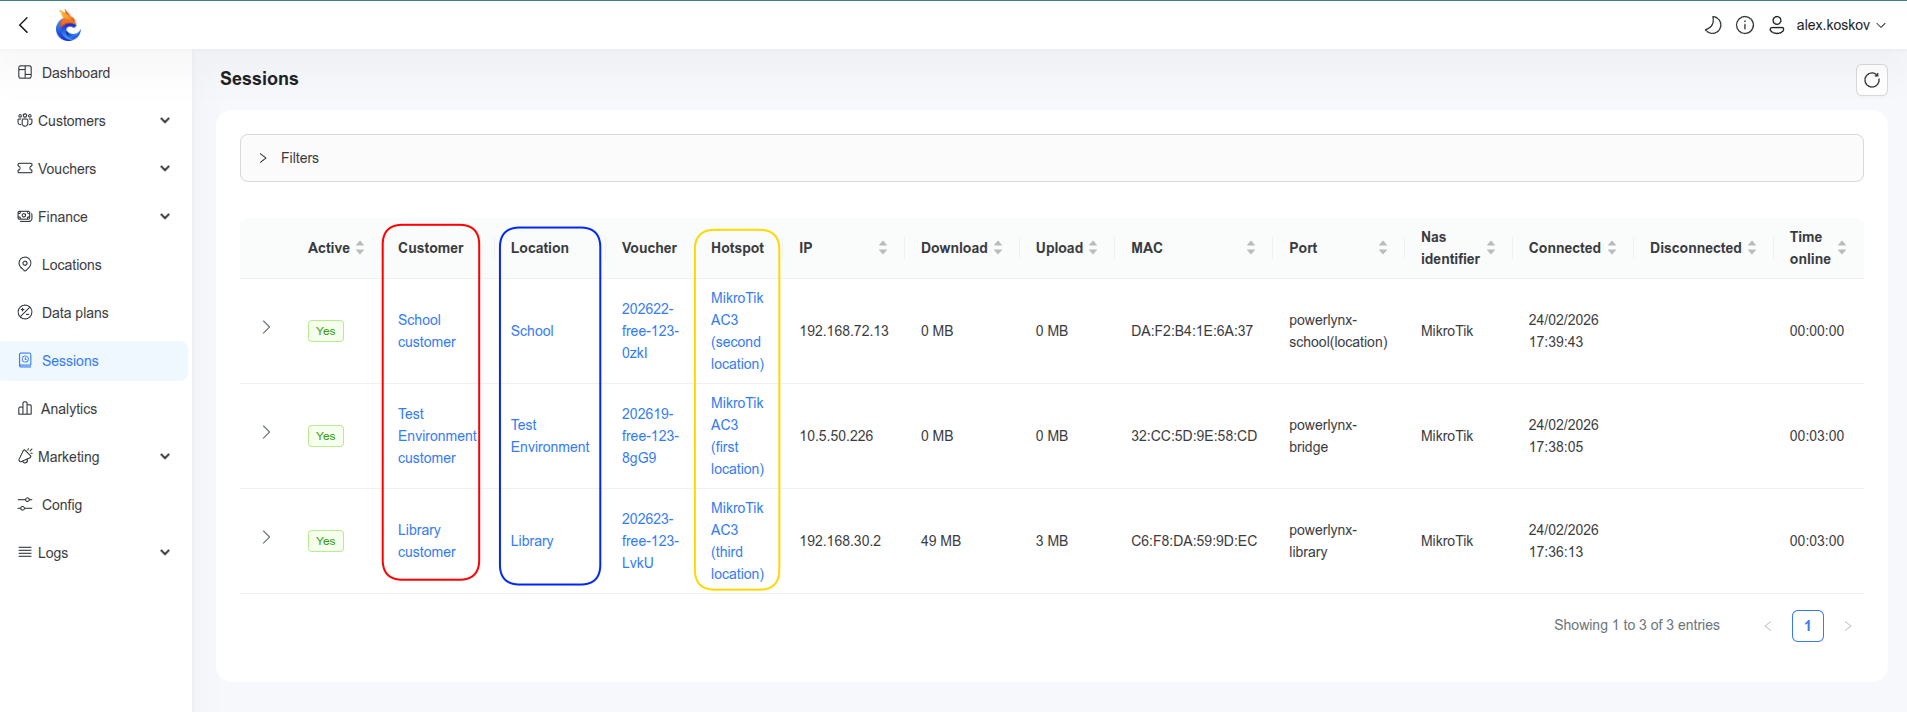
Expected Results
When configured correctly, users connecting to different physical interfaces (or SSIDs) on the same MikroTik will be redirected to their respective location-specific Splash Pages:
| Connection Type | RADIUS Domain | Target Location |
|---|---|---|
| WireGuard | vpn.powerlynx.app |
Location A |
| OpenVPN | openvpn.powerlynx.app |
Location B |
| Public IP | radius.powerlynx.app |
Location C |
Example: