In this topic, we are going to show an example of VLAN configuration to use a hotspot server with Powerlynx. For this example, we have used a MikroTik hap ac lite as the controller and a Unifi AP AC Lite as the access point. You can use other APs from different vendors as well.
It is crucial to know that the general configuration must be done on the MikroTik device, which has a Wireguard connection (you can use a Public IP if you have one) with Powerlynx, configured as a Radius-client with a hotspot server. You need to configure the MikroTik as we have shown in our documentation: MikroTIk Advanced setup. However, there is a small difference: you need to assign a VLAN interface on the hotspot server. On the AP device, we need to adopt it and configure only the Wi-Fi network, not enabling the guest portal on it.
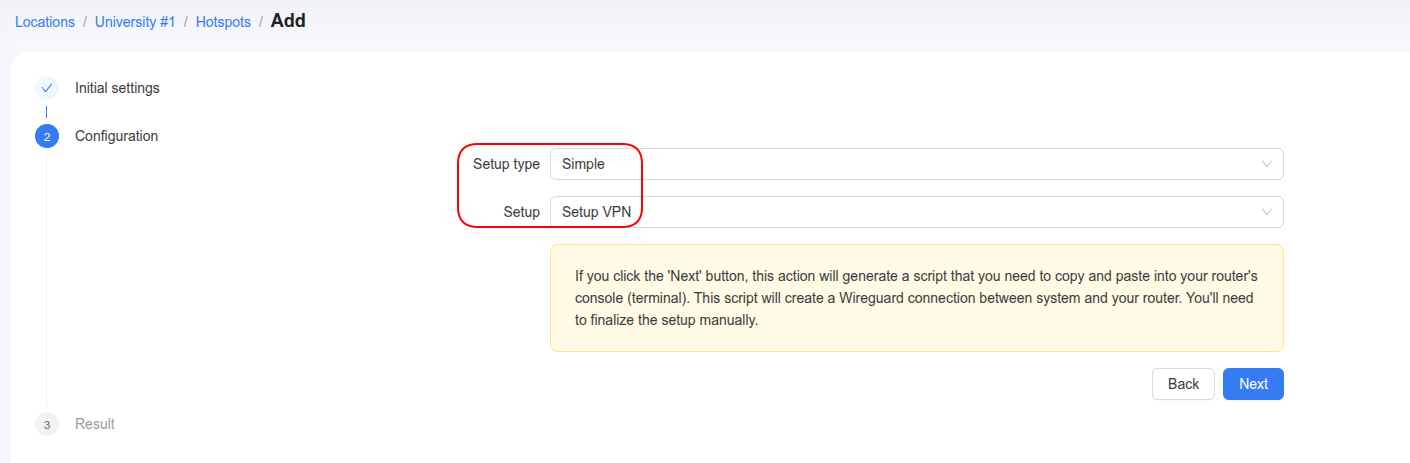
Note: Do not use the Simple setup “Full setup” if you want to integrate VLAN interfaces. Instead, use only “Simple setup: Setup VPN”, which generates a script to establish a WireGuard connection on your MikroTik hotspot controller.
After that, you should proceed with the steps shown below.
Simple setup: Setup VPN:
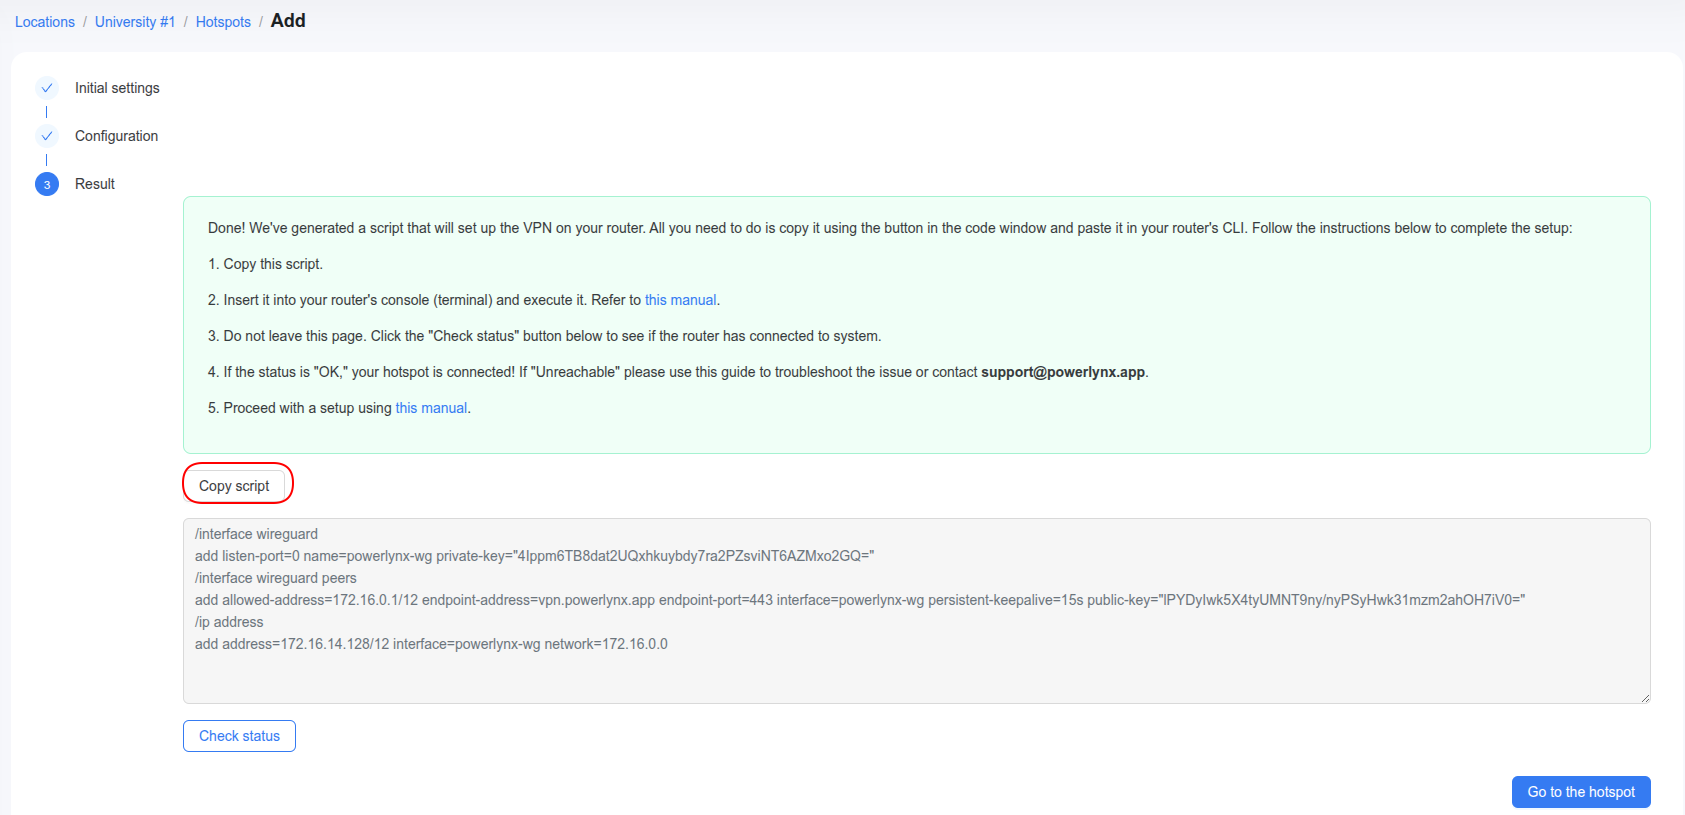
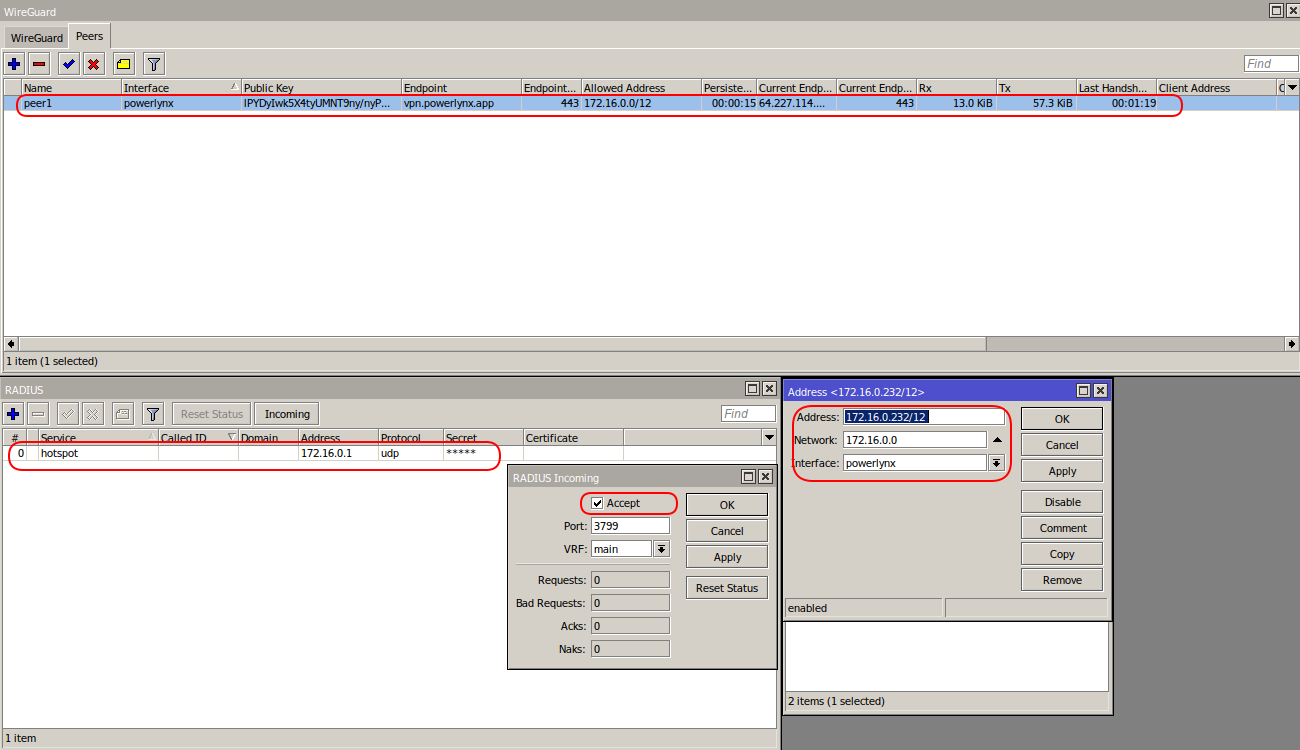
First of all, we need to connect our MikroTik to Powerlynx and configure the Radius-client (in this example, we use a Wireguard connection).
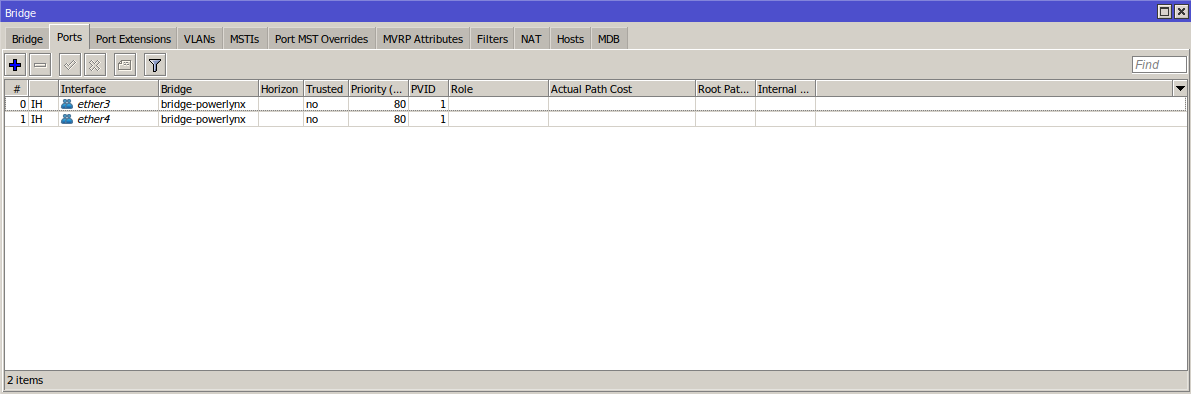
After that, we can create a bridge interface, which includes two Ethernet interfaces (one for the AP, another for the Unifi controller). In our example, ether3 is used for the laptop controller for the Unifi device, and ether4 is used to connect the Unifi AP AC Lite.

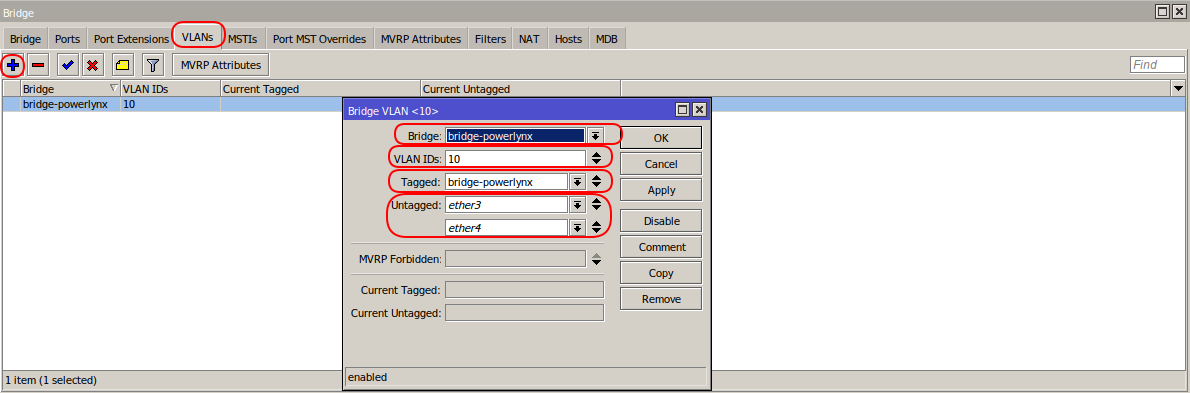
Now we are ready to create a VLAN interface on the bridge port: go to Bridge > VLANs > click “+”. You have to choose your bridge port.
-
Bridge - choose your bridge interface created for hotspot server;
-
VLAN IDs - set VLAN id you want to use;
-
Tagged - choose your bridge interface and interfaces which are connected to another routers or switches, that work with IEEE 802.11Q standard;
-
Untagged - choose interfaces that are connected to end-devices (laptops, some APs and etc.).
Then go to Interface>VLAN>click "+".
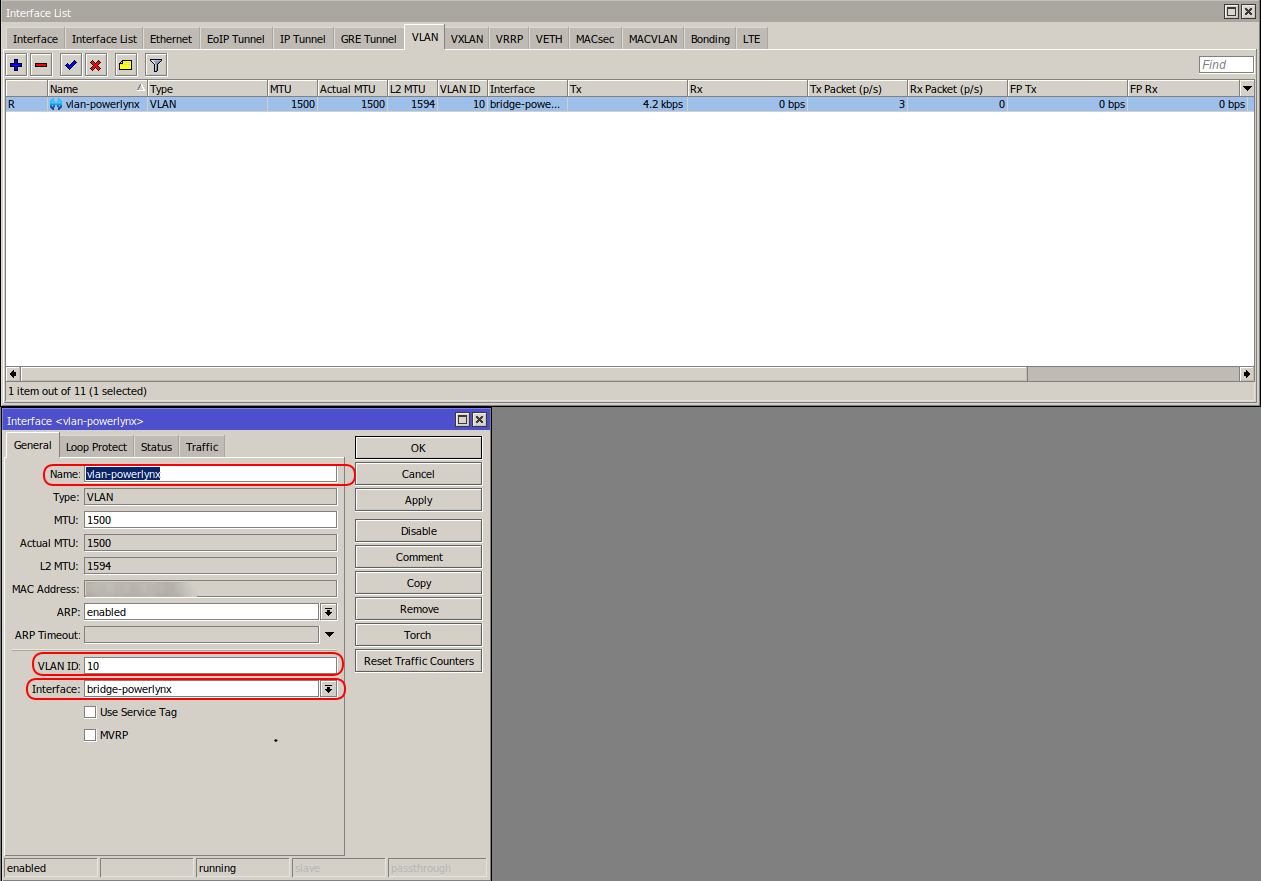
- Name - set the name for VLAN interface;
- VLAN ID - set the same VLAN ID;
- Interface - choose your bridge interface.
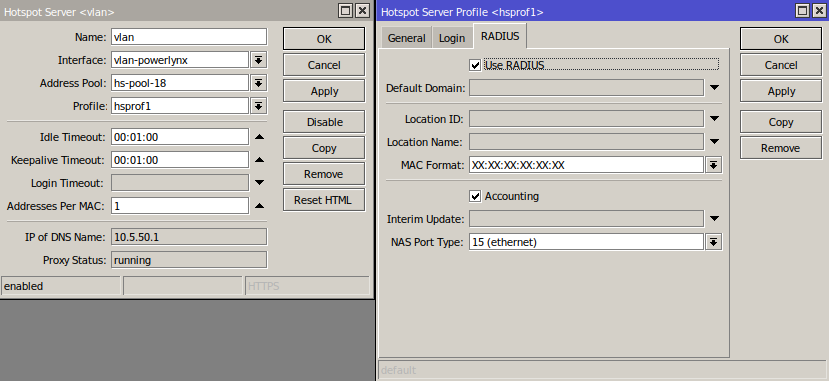
After that, we can create our hotspot server on the VLAN interface. I recommend using the "Hotspot Setup" tool. The configuration of the hotspot server is the same as we have shown in our documentation.
Now we need to change the value of PVID for our slave ports in the bridge interface. Go to Bridge > Ports > choose port > VLAN and set the same VLAN ID.
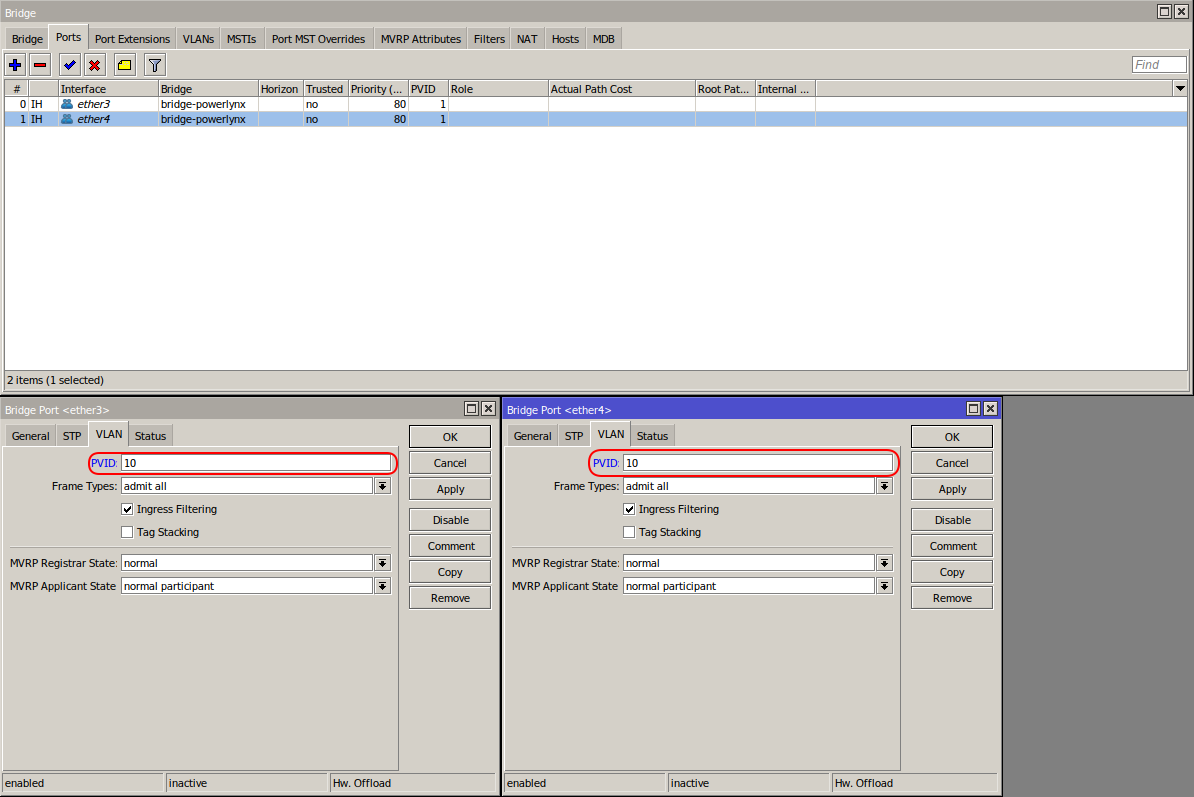
Now it is crucial to enable VLAN-Filtering for our bridge interface. There is no need to change the PVID for that interface.

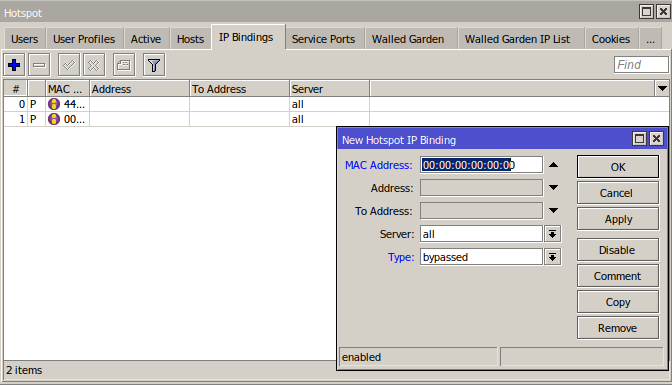
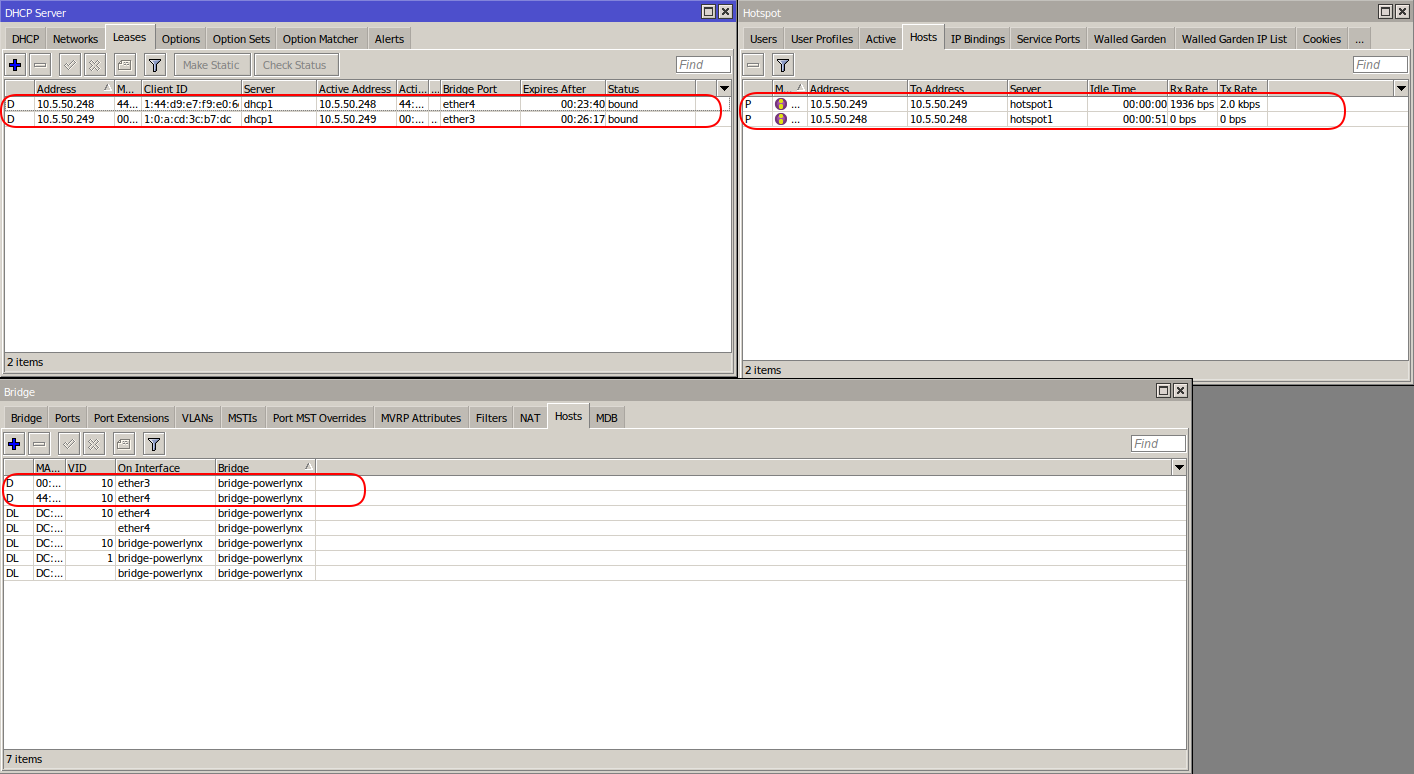
In our case, we have an unadopted Unifi device and a controller that is hosted locally on our laptop. To adopt the Unifi AP, these devices must be in the same hotspot network. To adopt it properly and have the ability to ping, I have added these devices to the bypass list. To do this, you can use the MAC Address or IP Address (I recommend to use MAC Address).
Make sure your AP gets an IP address from the correct IP range and is located in the correct VLAN ID.
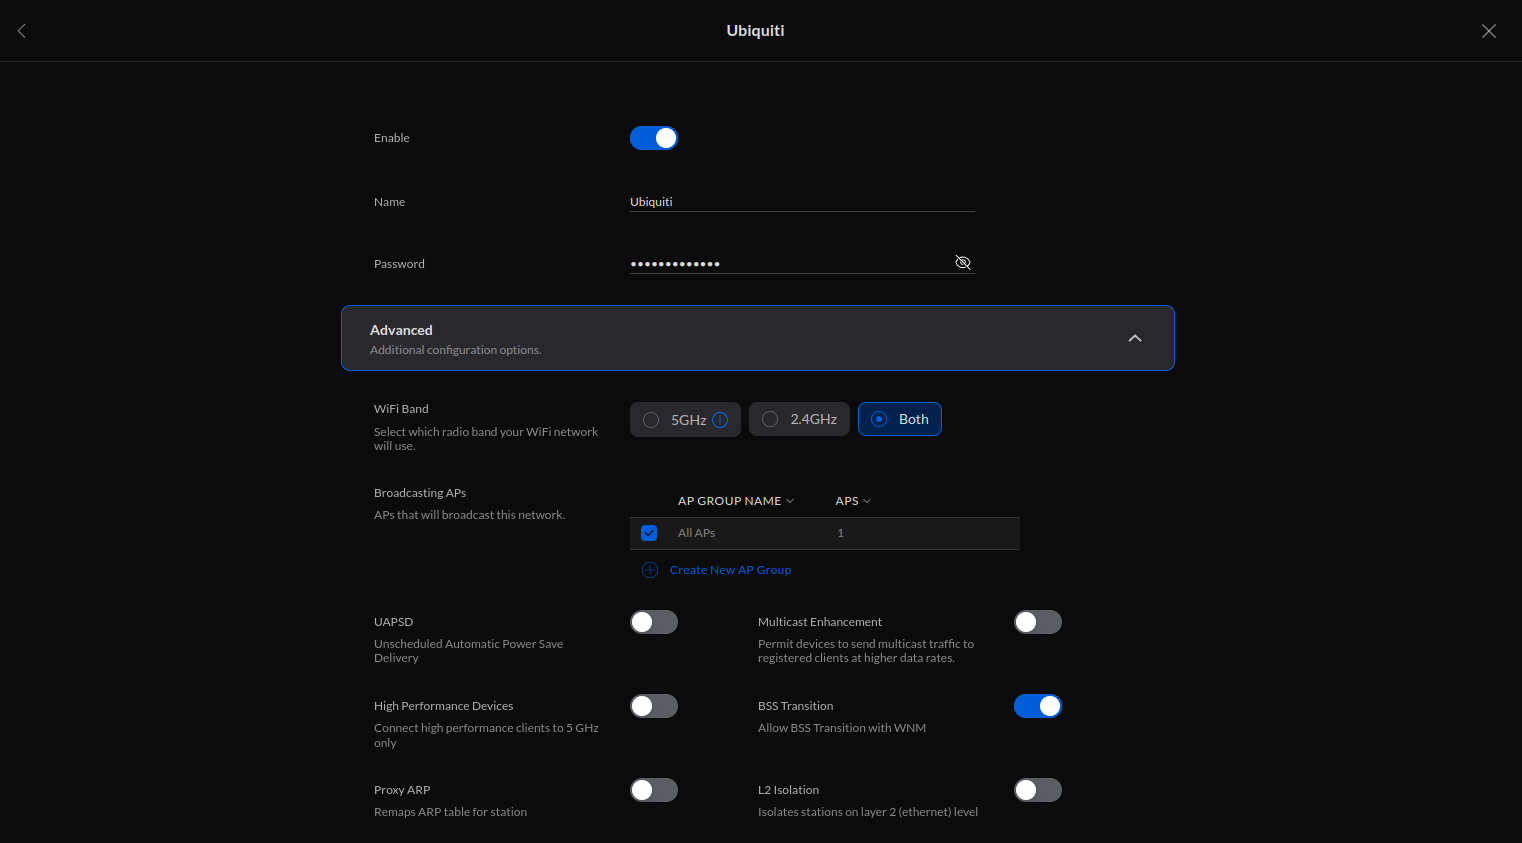
Then adopt your AP device and create a Wi-Fi network on it.

Don’t forget to customize login.html and add some hosts to Walled Garden list on your MikroTik device.
